
You’re a Sitecore developer and want to know how to implement the website(s) using Sitecore Experience Accelerator 1.7 Update 1 (aka SXA 1.7.1) on Sitecore Experience Platform 9 Update 2 (aka Sitecore XP 9.0.2) + Sitecore Experience Commerce 9 Update 2 (aka Sitecore XC 9.0.2) and following Helix principles.
If that is the case, you should set up Sitecore demo – Habitat Home Commerce – on your machine so that you’re able to play around with the Sitecore solution example and then learn something.
Personally, I’ve wanted to deal with the case: how to set up multi-instance Sitecore XC 9.0.2 so that I’m able to play with the vanilla XC 9.0.2 instance and this demo of XC 9.0.2 as well on my own machine.
Setup Preresiquites
- Windows 10
- Visual Studio 2017 (version 15.7 or later)
- Note: Visual Studio 2017 Version 15.7 and later supports migrating a project from the packages.config management format to the PackageReference format, click here to learn more about it
- Sitecore Experience Commerce 9.0 Update 2
- Habitat Home Platform
Step-by-step Guide
- install a fresh Sitecore Commerce 9.0 Update 2
- Note 1: Sitecore instance name should be habitathome.local and certificate for the Sitecore Commerce Engine should be issued to habitathome.local as well in this installation guide
- Note 2: you should consider to give this installation guide a shot when you have an existing instance of XC 9.0.X (X = 0, 1, 2) on your machine so that you don’t have to uninstall it before setting up this demo
- deploy Habitat Home Platform to Sitecore instance habitathome.local
- Note 1: we don’t need to install the following Sitecore modules in this installation guide because they’re installed in Step 1
- Note 2: should run quick-deploy gulp task rather than default one
- download or clone the git repo from Habitat Home Commerce 9.0.2.2
- restore all Node.js modules
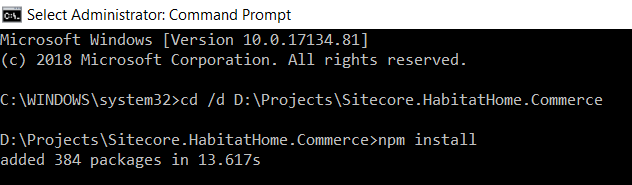
- run command line as Administrator
- change directory to Habitat Home Commerce directory
- execute npm install
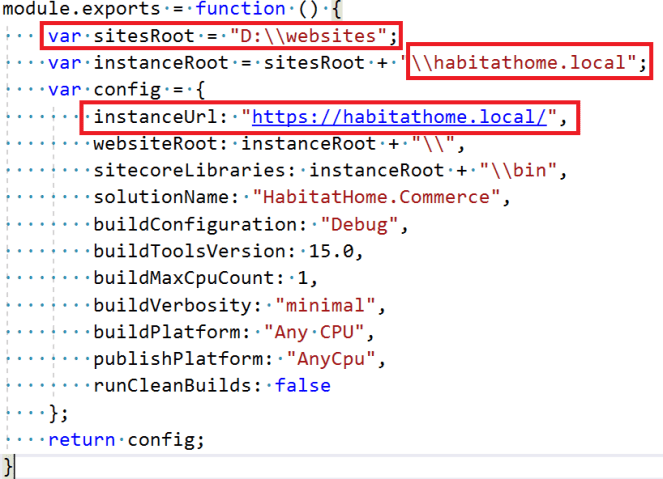
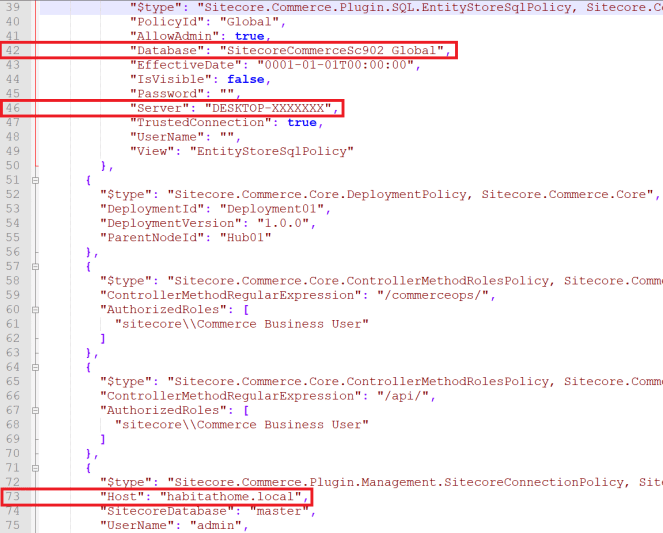
- Note: I don’t want to use the default settings so I need to adjust the appropriate values in the following files:
- \gulp-config.js
- \publishsettings.targets
- \src\Project\HabitatHome\website\App_Config\Include\Project\z.HabitatHome.Commerce.Website.DevSettings.config
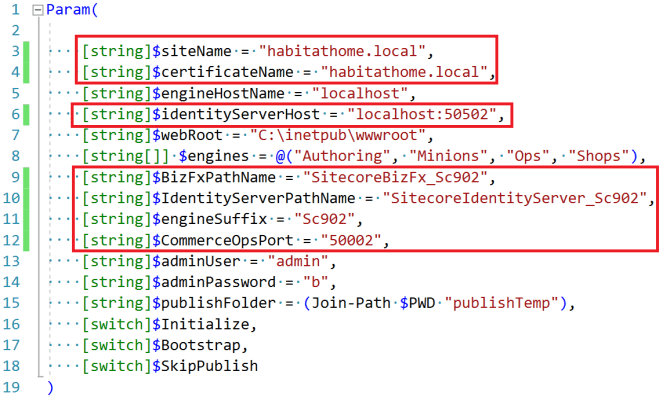
- \deploy-commerce-engine.ps1
- \src\Project\HabitatHome\engine\wwwroot\bootstrap\Global.json
- \src\Project\HabitatHome\engine\wwwroot\data\Environments\Plugin.SQL.PolicySet-1.0.0.json
- \gulp-config.js
- Note: if you use the custom Service Ports rather than the default ones, you will have to correct them in various places
- open Visual Studio
- correct all the Service Ports one by one 😀
- find all localhost: in the entire solution

- find all //{0}: in the entire solution

- find all SslPort in the entire solution

- open \HabitatHome.Commerce.sln with Visual Studio 2017
- deploy the solution
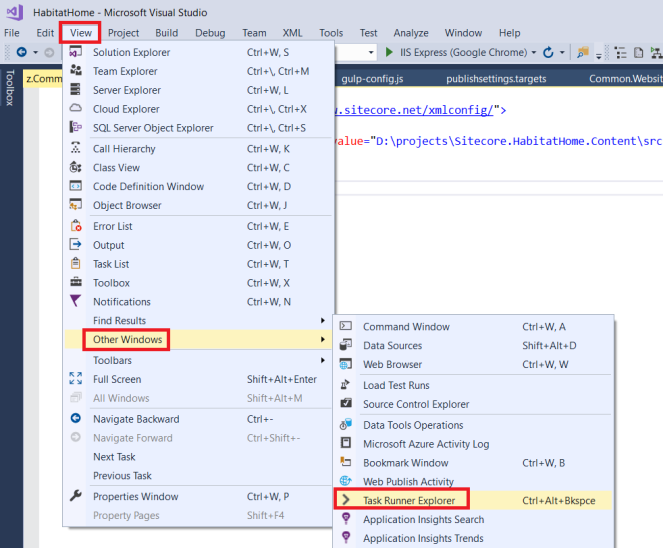
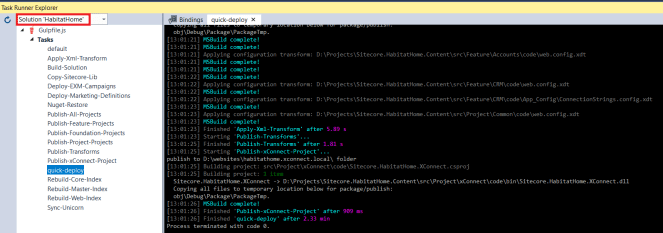
- open Task Runner Explorer on View -> Other Window -> Task Runner Explorer
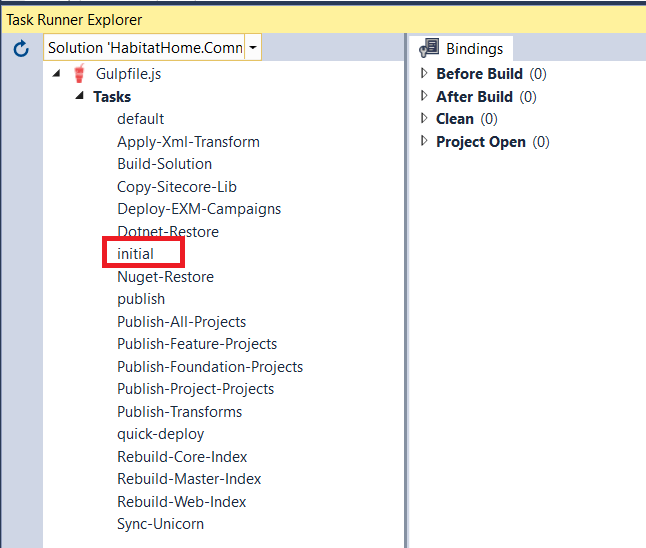
- choose Solution ‘HabitatHome.Commerce’ from list, then click refresh button
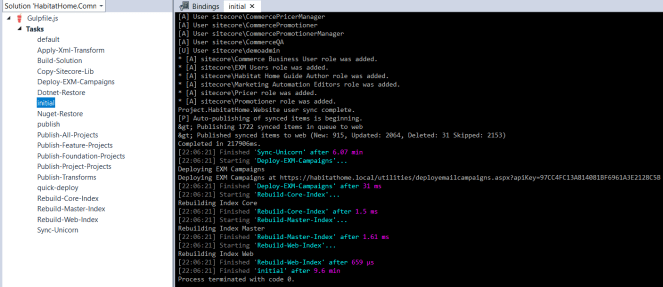
- from task list, double click on initial task to run it
- Note: for Visual Studio 2017 on your own machine, you might have to run gulp tasks via Command Prompt (run as Administrator)
- hopefully everything runs well and then you would see something like this
- deploy the engine
- launch PowerShell as an administrator
- change directory to Habitat Home Commerce directory
- execute .\deploy-commerce-engine.ps1 -Boostrap -Initialize
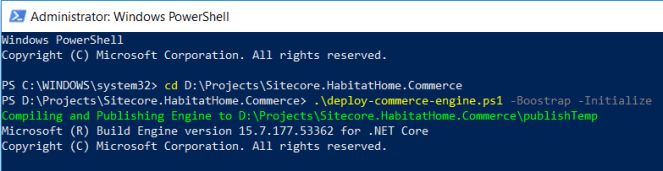
- hopefully everything runs well and then you would see something like this
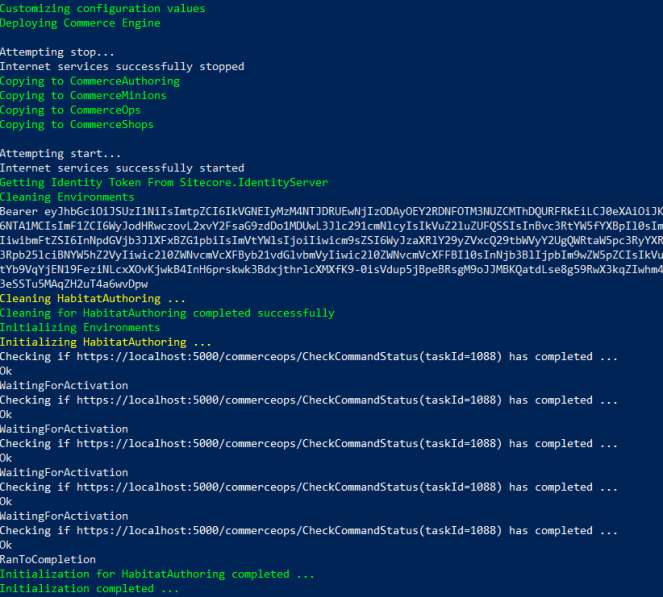
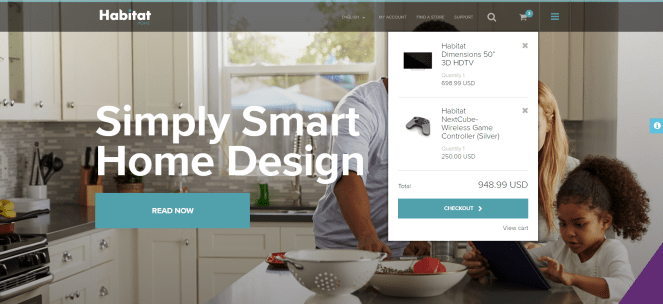
- open a browser and then navigate to https://habitathome.local, you would see something like this after adding some products to cart successfully


Note: some known issues
- Visual Studio’s Task Runner: SyntaxError: Unexpected token
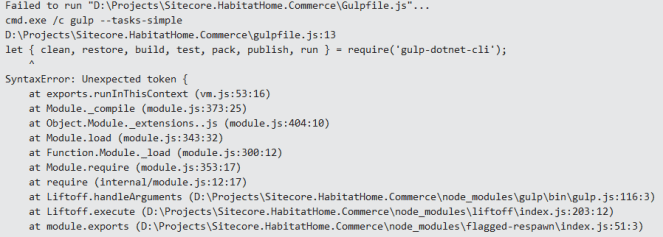
- my suggestion: have a look at https://stackoverflow.com/questions/45580456/visual-studio-task-runner-error-with-es6 in order to overcome the issue
- Invoke-RestMethod: The remote server returned an error: (500) Internal Server Error
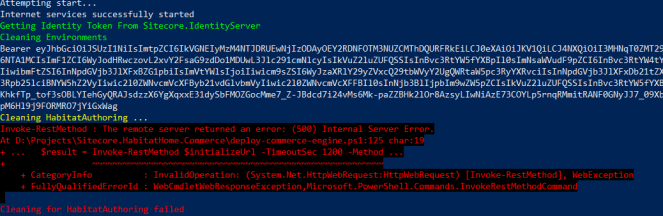
- open the log file you would see something like this
-
ERROR Connection id “”0HLE4OSSCC354″”, Request id “”0HLE4OSSCC354:00000001″”: An unhandled exception was thrown by the application.Microsoft.AspNetCore.Antiforgery.AntiforgeryValidationException: The required antiforgery cookie “.AspNetCore.Antiforgery.cf4m-F-R1lY” is not present.
- my suggestion: ensure the engine suffix correct in deploy-commerce-engine.ps1 and then perform Step 10 again
- Cleaning Environments: HTTP Error 502.5
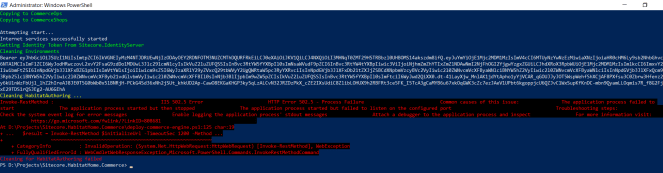
- open Windows Event Viewer, you should see something like this
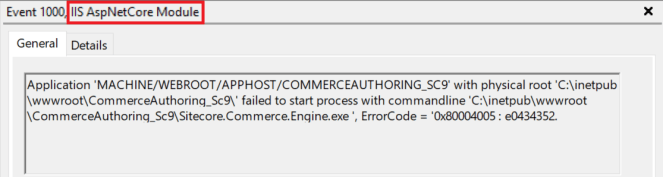
- my suggestions: probably ASP.NET Core module was not installed correctly on your machine, you should try to install the latest version of .NET Core 2.0 (Runtime) and then perform Step 10 again
- Empty strings are not allowed. Parameter name: value
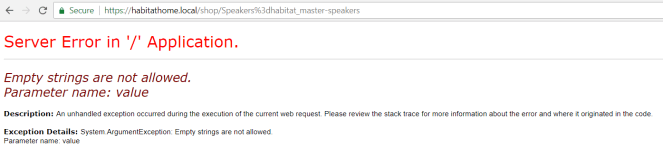
- my suggestion:
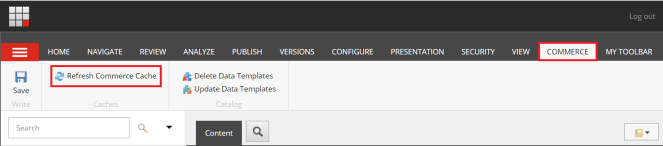
- log into https://habitathome.local/sitecore
- hit Refresh Commerce Cache in the COMMERCE tab of Content Editor
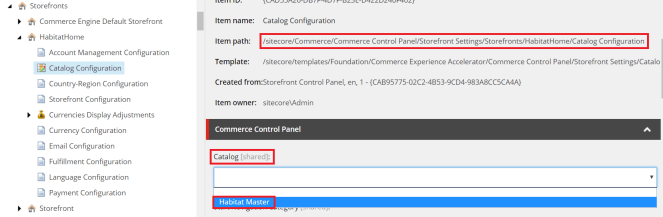
- access /sitecore/Commerce/Commerce Control Panel/Storefront Settings/Storefronts/HabitatHome/Catalog Configuration
- update Catalog to Habitat Master then save
- Guid should contain 32 digits with 4 dashes
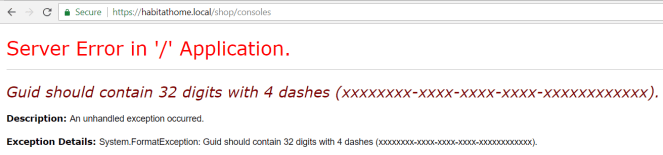
- my suggestion:
- log into https://habitathome.local/sitecore
- make sure that Solr is running properly by rebuilding the search indexes in the Sitecore client (Control Panel => Indexing Manager) if not yet
- select the checkbox sitecore_master_index and then click Rebuild button
- hit Refresh Commerce Cache in the COMMERCE tab of Content Editor
Got issues?
Please send your issues (with screenshots if possible) to viet.hoang.sitecore@gmail.com so that I have a chance to understand your problem and be able to suggest the solution.
Happy Sitecore Demo Installation!

6 thoughts on “Sitecore XC 9.0.2 Demo – Habitat Home Commerce – Step by step Setup Guide”