This blog post is a summary of my own experience for Sitecore Experience Platform 10.1 Update 2 (e.g Sitecore 10.1.2) installation on my machine with the following install guide:
- Installation Guide for Developer Workstation with Containers (Thanks Sitecore team!)
Prerequisites
- Windows 10 version 1809 or higher
- >= 16 Gb of memory
- Sitecore 10 license file
- the latest Docker Desktop
Step-by-step Guide
- ensure to set up your docker environment by following https://containers.doc.sitecore.com/docs/environment-setup
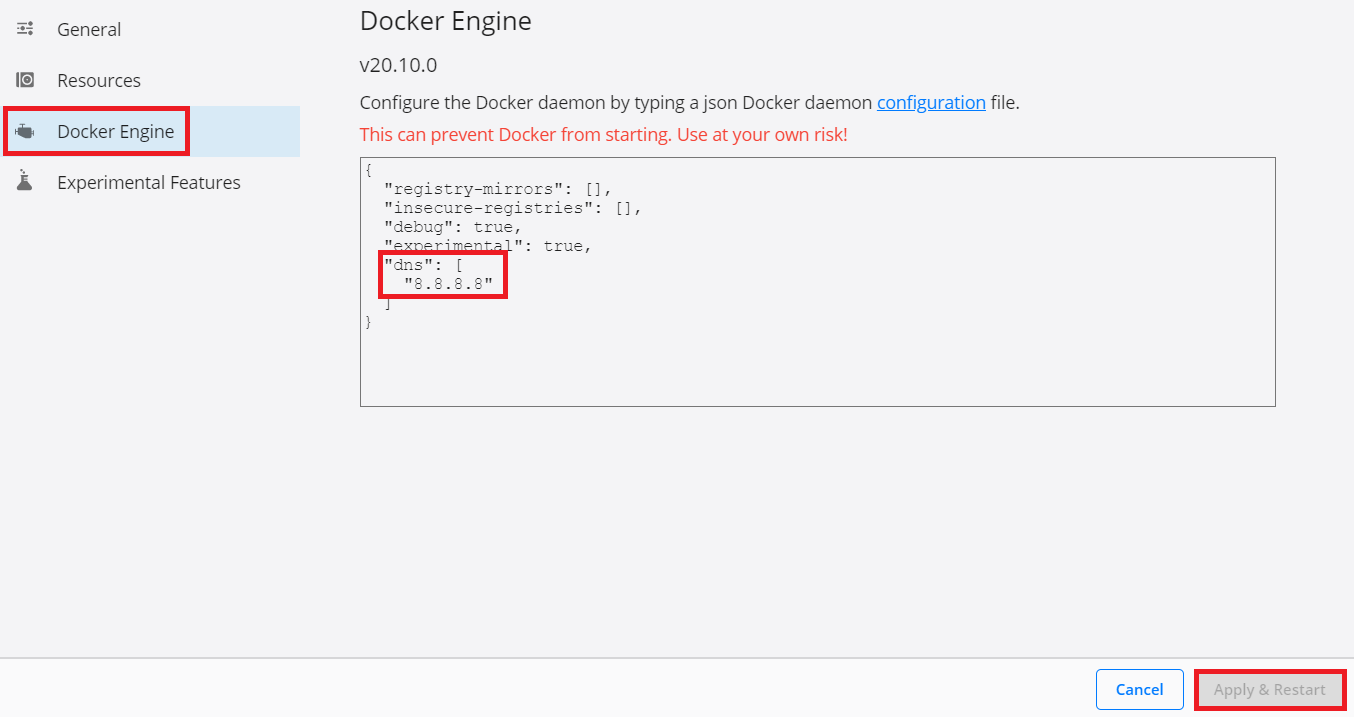
- try to bypass some common network issues by setting DNS servers in the Docker engine configuration:
- open Docker Desktop and then select Settings => Docker Engine
- ensure the value of the
"dns"key is set to["8.8.8.8"]if any - click Apply & Restart button
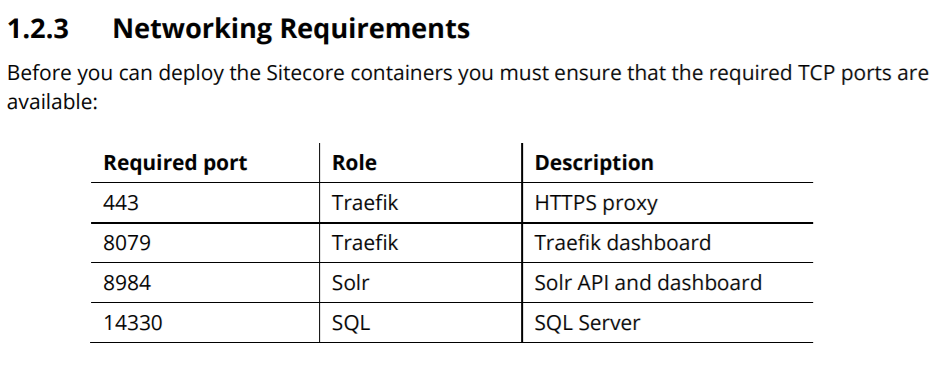
- to avoid any conflicts, we should ensure the following ports are not being used by another process: 443, 8079, 8984, and 14330 (Page 6 in Installation Guide for Developer Workstation with Containers)
- stop IIS
- stop windows services if any
- quit Skype for sure
- create a new folder D:\sc1012_install
- download and unzip Container Deployment Package
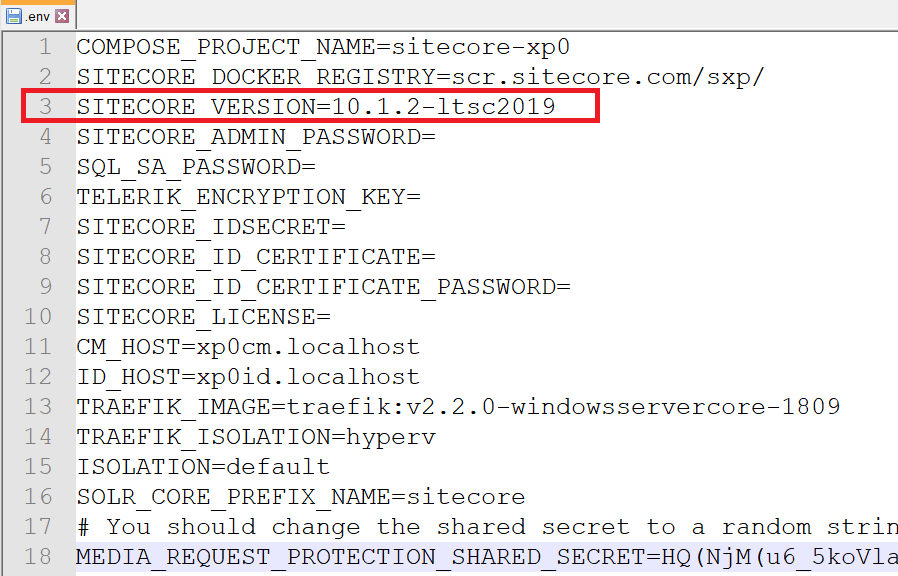
- correct the Sitecore version 10.1.2-ltsc2019 in D:\sc1012_install\SitecoreContainerDeployment.10.1.2.006578.651\compose\ltsc2019\xp0\.evn
- create all certificates and initialize the environment file of Windows Server Core version ltsc2019 and XP Single topology (xp0)
- download init.ps1 and then put it into D:\sc1012_install\SitecoreContainerDeployment.10.1.2.006578.651\compose\ltsc2019\xp0
- Note: the original file is of Sitecore Docker Examples
- edit “HostName” parameter and be able to change other default values as well
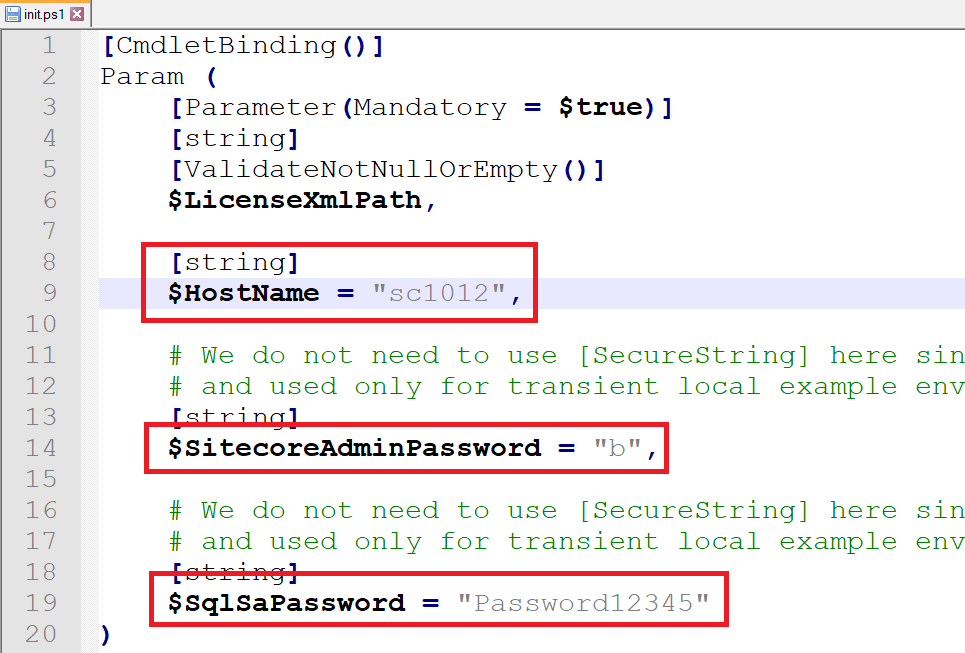
- ensure that this file C:\license\license.xml is available, otherwise will see this error message later License file is not found. or “License not found at ‘C:\license\license.xml’”
- open Windows PowerShell (run as administrator)
- change directory to D:\sc1012_install\SitecoreContainerDeployment.10.1.2.006578.651\compose\ltsc2019\xp0
- execute
.\init.ps1 -LicenseXmlPath C:\license\license.xml 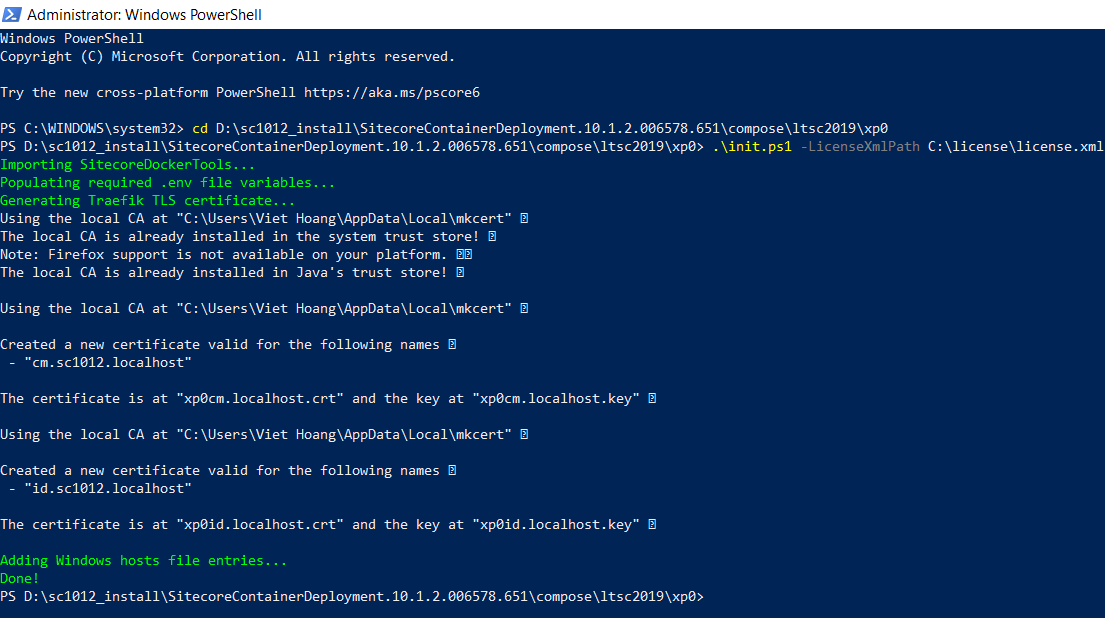
- download init.ps1 and then put it into D:\sc1012_install\SitecoreContainerDeployment.10.1.2.006578.651\compose\ltsc2019\xp0
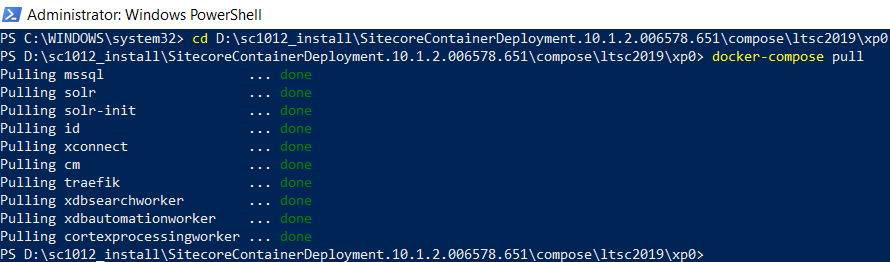
- pull Sitecore docker images
- open Windows PowerShell (run as administrator)
- change directory to D:\sc1012_install\SitecoreContainerDeployment.10.1.2.006578.651\compose\ltsc2019\xp0
- execute
docker-compose pull 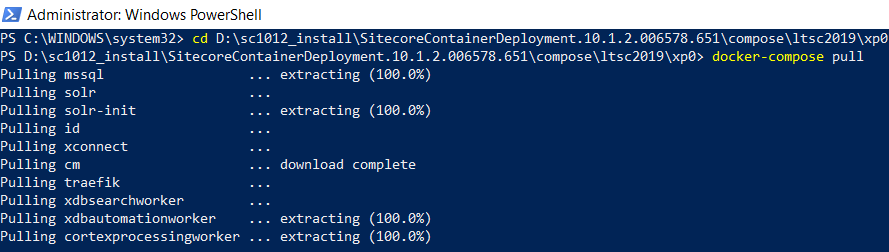
- spin up the container-based Sitecore instances
- open Windows PowerShell (run as administrator)
- change directory to D:\sc1012_install\SitecoreContainerDeployment.10.1.2.006578.651\compose\ltsc2019\xp0
- execute
docker-compose up --d 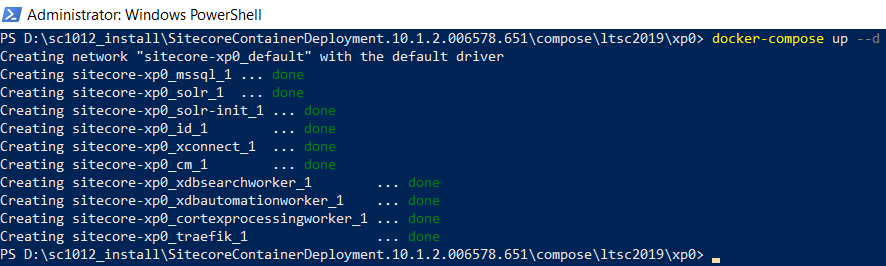
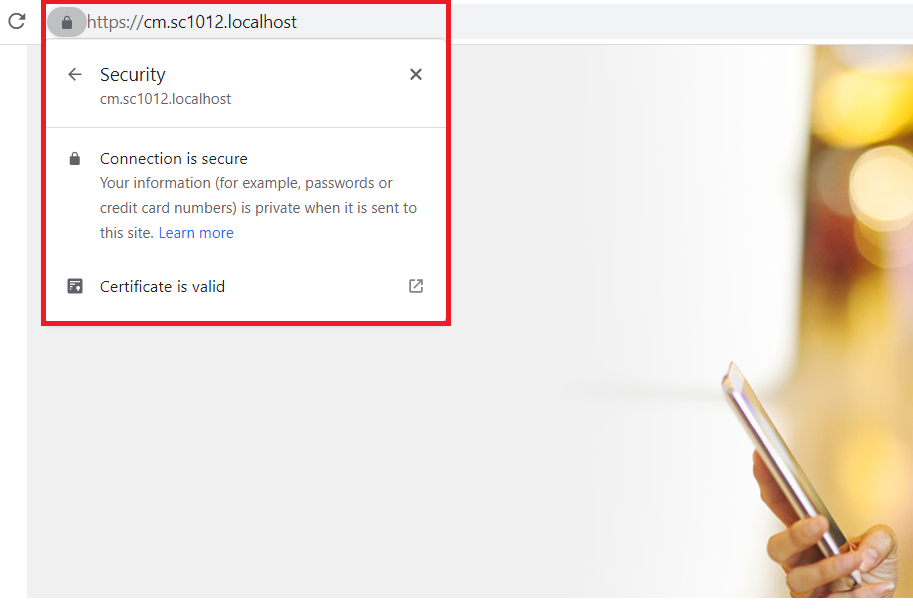
- open a browser, navigate to https://cm.sc1012localhost/, we would see the default Sitecore page and a valid SSL certificate
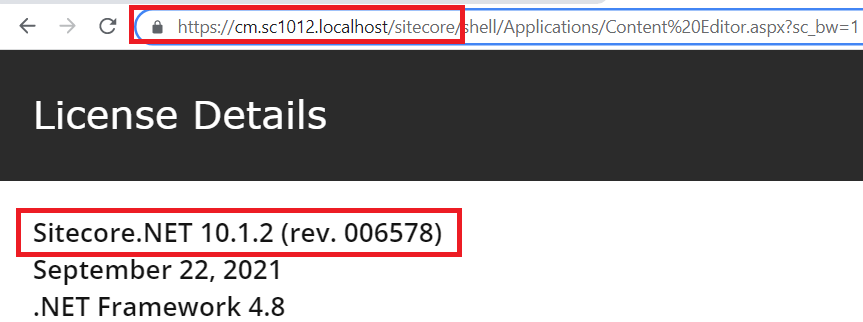
- open a browser, navigate to https://cm.sc1012.localhost/sitecore, we should be able to login with the admin user and b password by default
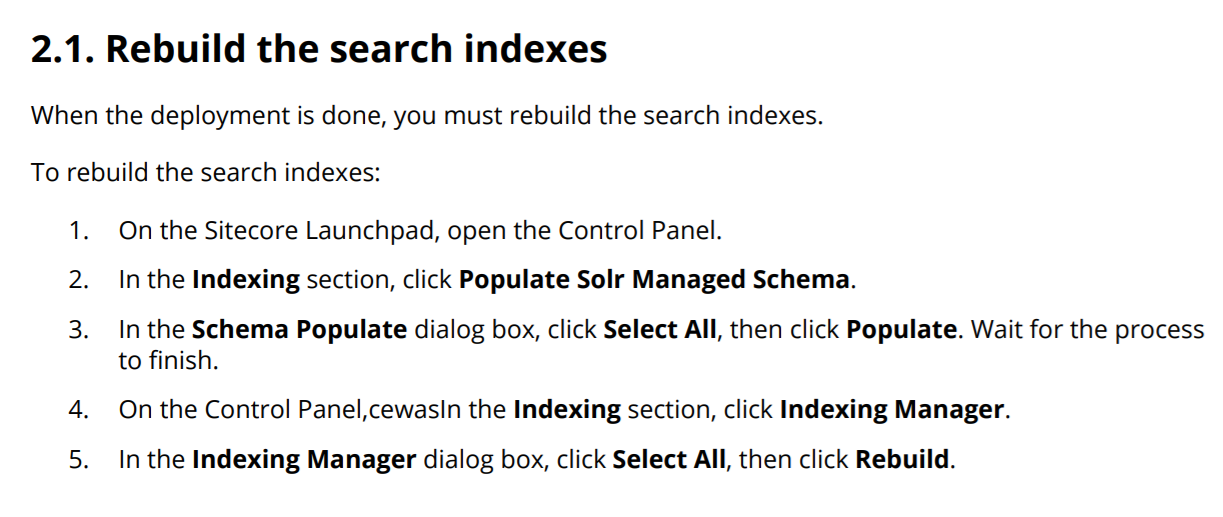
- DON’T FORGET to perform the following thing as well (Page 12 in Installation Guide for Developer Workstation with Containers)

Notes
- for stopping the Sitecore instances without losing the changes
- open Windows PowerShell (run as administrator)
- change directory to D:\sc1012_install\SitecoreContainerDeployment.10.1.2.006578.651\compose\ltsc2019\xp0
- execute
docker-compose stop 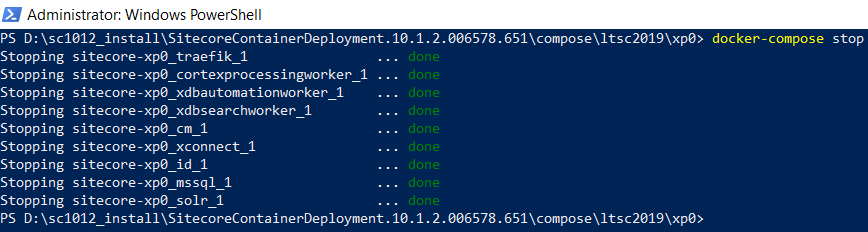
- start the Sitecore instances again by executing
docker-compose start 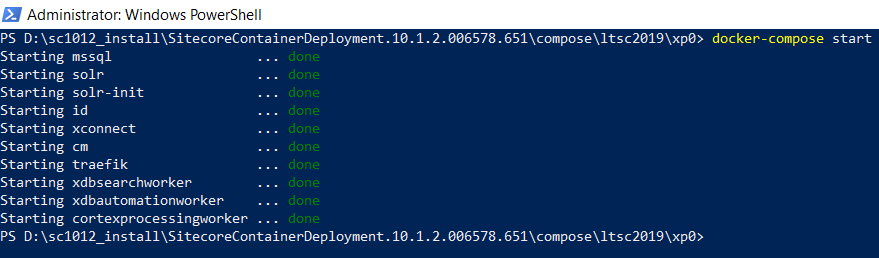
- for data cleanup
- download clean.ps1 and then put it into D:\sc1012_install\SitecoreContainerDeployment.10.1.2.006578.651\compose\ltsc2019\xp0
- Note: the original file is of Sitecore Docker Examples
- open Windows PowerShell (run as administrator)
- change directory to D:\sc1012_install\SitecoreContainerDeployment.10.1.2.006578.651\compose\ltsc2019\xp0
- execute
docker-compose down - execute
.\clean 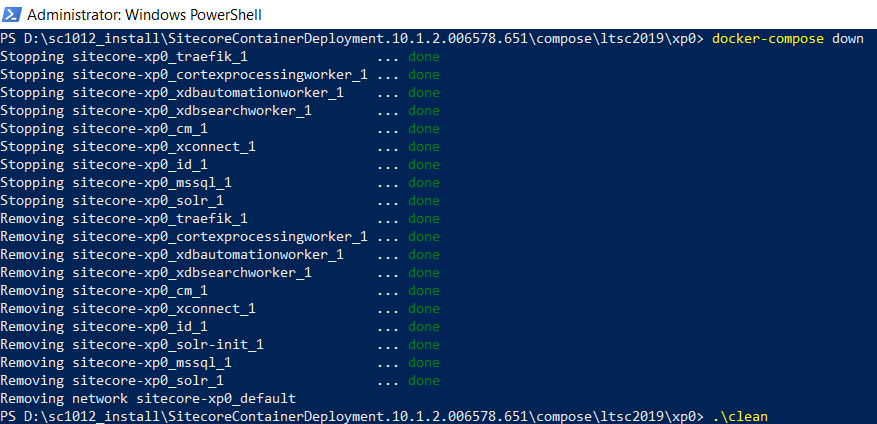
- download clean.ps1 and then put it into D:\sc1012_install\SitecoreContainerDeployment.10.1.2.006578.651\compose\ltsc2019\xp0
Happy Sitecore 10.1 Update 2 Installation!

2 thoughts on “Sitecore XP 10.1 Update 2 – Installation – Docker Way”