
This post is to present an approach for storing Sitecore media assets on the file system and how to get synced between CA and CD at your machine by using Microsoft Web Deployment tool, the reference:
- 3.4.2 Web Deployment
- 4.12 How to: Configure Web Deployment
Assumptions
- Storing Sitecore Media Assets on the File System
- Using Web Deploy v3.6
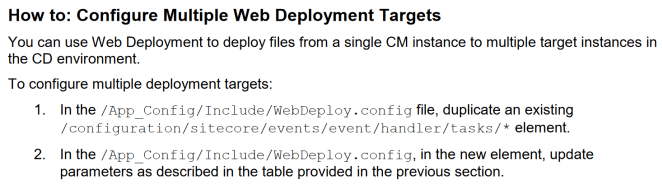
- Configuring Web Deployment of file media from CA to CD via /App_Config/Include/WebDeploy.config file
Setup Prerequisites
- Sitecore 8.2
- Web Deploy v3.6
- IIS 8.0 or later
- Windows 10
How to set it up
- Use SIM to setup 02 new Sitecore 8.2 instances:
- 01 CA whose site name should be viethoang.ca.local
- 01 CD whose site name should be viethoang.cd.local
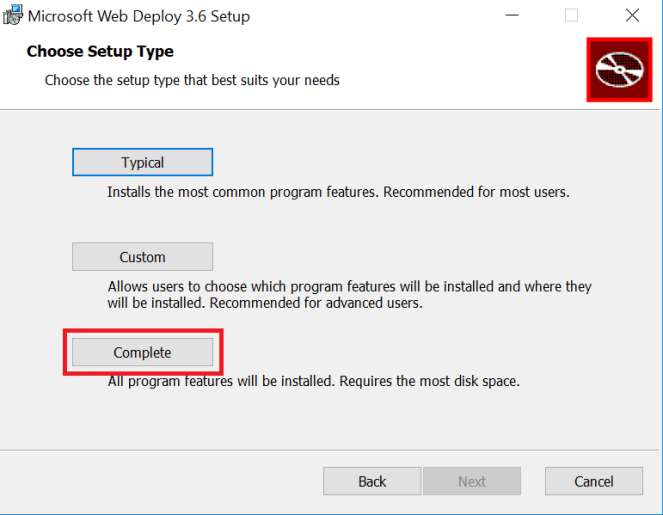
- Install Web Deploy v3.6
- select Complete option
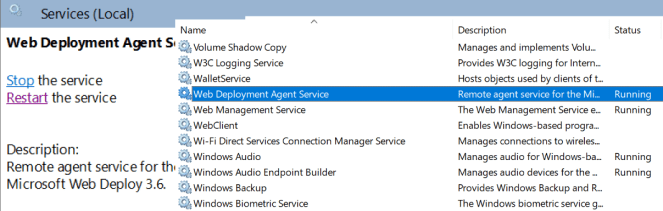
- click Start, click Run, type Services and then press ENTER
- make sure Web Deployment Agent Service is running
- CA: edit \App_Config\Sitecore.config to enable storage of media as files rather than database records
- CA: remove .example out of \App_Config\Include\WebDeploy.config.example
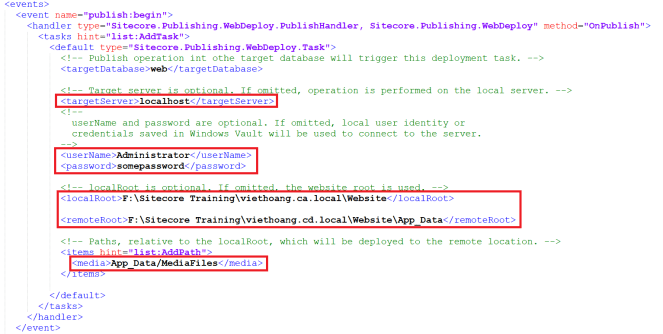
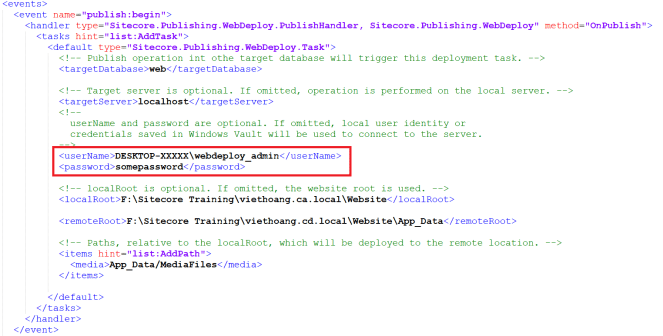
- CA: edit \App_Config\Include\WebDeploy.config and use the built-in Administrator account for deployment
- log into CA, upload a media item and make sure it uploaded as file
-
- publish a media item above and hopefully you would see that file in CD’s media folder as well
- open the CA’s latest log file, you would see something like this
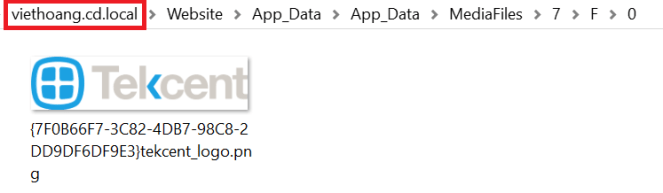
- open CD’s media folder, you would see
- we’re done with the Administrator account


How is non-built-in admin account?
- create a new admin account, for instance webdeploy_admin
- CA: edit \App_Config\Include\WebDeploy.config and use {domain}\webdeploy_admin for web deploy
- log into CA, upload a media item and publish it
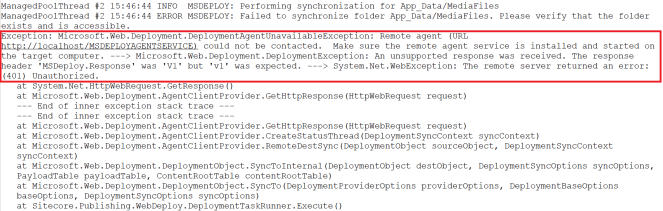
- open CA’s latest log file, hopefully you get positive info like the one above, otherwise you would see something like this
- per my search, we need to disable User Account Control (UAC) remote restrictions, learn more about it
- follow these steps are mentioned in the link above
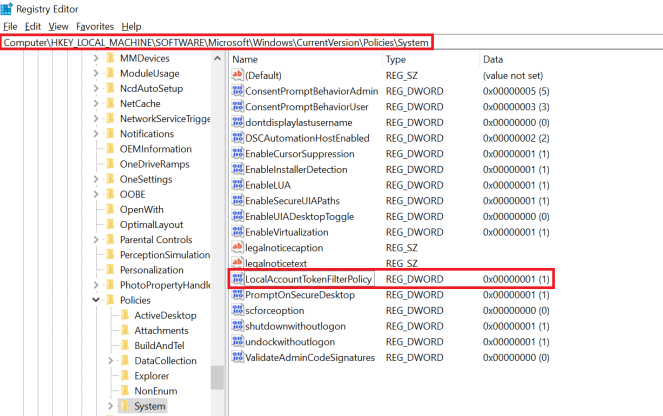
- click Start, click Run, type regedit, and then press ENTER.
- locate and then click the following registry subkey:
HKEY_LOCAL_MACHINE\SOFTWARE\Microsoft\Windows\CurrentVersion\Policies\System - if the LocalAccountTokenFilterPolicy registry entry does not exist, follow these steps:
- on the Edit menu, point to New, and then click DWORD Value
- type LocalAccountTokenFilterPolicy, and then press ENTER
- right-click LocalAccountTokenFilterPolicy, and then click Modify
- in the Value data box, type 1, and then click OK
- back to CA and publish something
- open CA’s latest log file and CD’s media folder to verify it’s working properly
-
- we’re done with non-built-in admin account
From the reference with Love (page 47)
Got issues?
Please send your issues (with screenshots if possible) to viet.hoang.sitecore@gmail.com so that I have a chance to understand your problem and be able to suggest the solution.
Happy Sitecore Playing!

2 thoughts on “Playing around with Sitecore 8 and Web Deploy”