
This one is a summary of my own experience for Sitecore Experience Platform 9.2 Initial Release (aka Sitecore XP 9.2.0) installation on my machine. I’ve had much experience in Sitecore XP 9.0 and Sitecore XP 9.1 installations so I decided to go only with the following ones:
- Quick Installation Guide for a Developer Workstation (Thanks Sitecore team!)
- Note: must log into https://dev.sitecore.net/ before downloading
I do hope that this blog post is helpful for your own journey as well.
Note: personally, I wanted to use my own install directory rather than the default one
Setup Prerequisites
- Windows 10
- Windows PowerShell version 5.1 or later
- Sitecore License must have xDB enabled
- MS SQL Server 2016 SP2 or later
- .Net Framework 4.7.2 or later
- .NET Core 2.1.7 Windows Hosting Module
- Web Deploy 3.6
- URL Rewrite 2.1
- SOLR 7.5.0
- Java Runtime Environment
- NSSM
- Sitecore Install Framework (SIF) 2.1.0 or later
- Packages for XP Single
- Note: must log into https://dev.sitecore.net/ before downloading
- ensure to enable the Transport Layer Security (TLS) protocol version 1.2
Step by step guide
- create a new folder D:\sc920_install
- install SOLR 7.5.0 if not yet
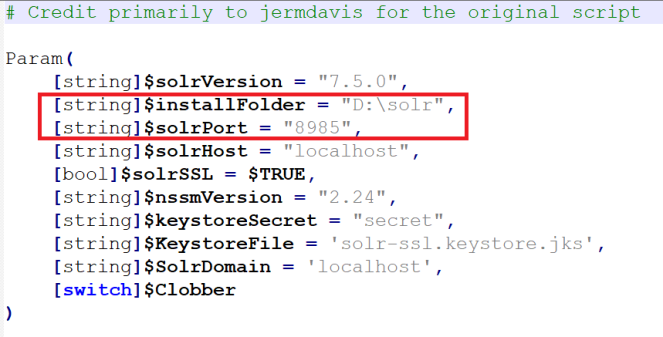
- copy / paste install-solr.ps1 and helper.psm1 into D:\sc920_install
- note 1: the original ones are here and here of Sitecore.HabitatHome.Utilities
- note 2: you may want to use your own settings rather than default settings by opening install-solr.ps1 and editing the following ones:
- open Windows PowerShell (run as administrator)
- execute .\install-solr
- (optional) install Sitecore Install Framework (SIF) if not yet
- refer to 3.1.1. Install the SIF Module using MyGet (Page 11) in Quick Installation Guide for a Developer Workstation
- open Windows PowerShell (run as administrator)
- if you have never installed Sitecore 9 before, you will probably want to execute Set-ExecutionPolicy -Scope CurrentUser Unrestricted

- use the following commands to install the latest version of SIF
- Register-PSRepository -Name SitecoreGallery -SourceLocation https://sitecore.myget.org/F/sc-powershell/api/v2
- Install-Module SitecoreInstallFramework
- (optional) if you already installed previous SIF versions, you would have upgraded it to a new version 2.1.0
- open Windows PowerShell (run as administrator)
- you should use the following command to get all the the current SIF versions
-
Get-Module -Name SitecoreInstallFramework -ListAvailable
-
- option 1: use the following command to update to the latest version of SIF
- Update-Module SitecoreInstallFramework -force
- option 2: use the following commands to remove the currents and then install the latest version of SIF
-
Uninstall-Module SitecoreInstallFramework -AllVersions
-
Install-Module SitecoreInstallFramework
-
- enable Contained Database Authentication if not yet
- refer to 2.8. Enable Contained Database Authentication (Page 08) in Quick Installation Guide for a Developer Workstation

- Note: you can download the query above here
- download and unzip Package for XP Single (Note: must log into https://dev.sitecore.net/ before downloading)
- copy / paste the following ones to D:\sc920_install
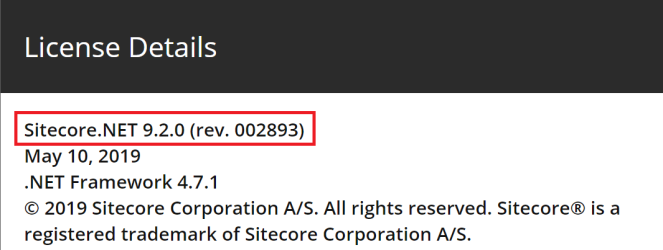
- Sitecore 9.2.0 rev. 002893 (OnPrem)_single.scwdp.zip
- Sitecore 9.2.0 rev. 002893 (OnPrem)_xp0xconnect.scwdp.zip
- Sitecore.IdentityServer 3.0.0 rev. 00211 (OnPrem)_identityserver.scwdp.zip
- unzip XP0 Configuration files 9.2.0 rev. 002893.zip and copy / paste all files to D:\sc920_install
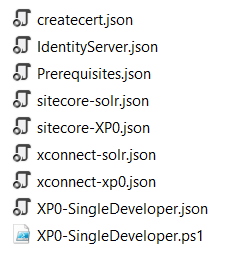
- copy / paste the following ones to D:\sc920_install
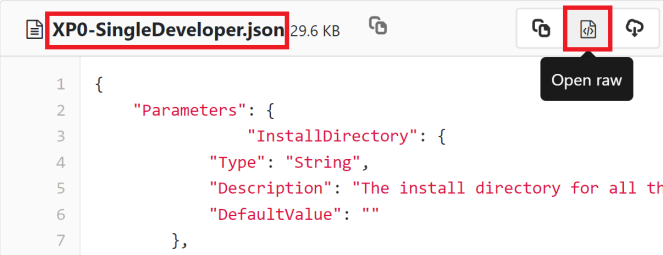
- override sitecore-XP0.json + xconnect-xp0.json + IdentityServer.json + XP0-SingleDeveloper.json in order to inject the custom install directory so we will have something like following ones later
- open raw and then copy / paste sitecore-XP0.json into D:\sc920_install\sitecore-XP0.json
- open raw and then copy / paste xconnect-xp0.json into D:\sc920_install\xconnect-xp0.json
- open raw and then copy / paste IdentityServer.json into D:\sc920_install\IdentityServer.json
- open raw and then copy / paste XP0-SingleDeveloper.json into D:\sc920_install\XP0-SingleDeveloper.json
- (optional) download + unzip ConfigsForDirectories.zip and then copy / paste all to D:\sc920_install
- copy / paste your Sitecore licence file license.xml to D:\sc920_install
- (optional) if you have never installed Sitecore 9 before, you will probably want to install the prerequisites
- open Windows PowerShell (run as administrator)
- execute Install-SitecoreConfiguration -Path .\prerequisites.json
- download sc920_install.ps1 and copy / paste it to D:\sc920_install then open it to correct the following parameters:
- (optional) $InstallDirectory (this one is to specify your own install directory)
- Note: it’s “D:\websites\” by default, you should update it if the disk space is low
- (optional) $Prefix
- $SqlServer
- $SqlAdminUser
- $SqlAdminPassword
- (optional) $SitecoreAdminPassword
- Note: leave the example value “SIF-Default” unchanged, a random password is generated for you
- (optional) $InstallDirectory (this one is to specify your own install directory)
- open Windows PowerShell (run as administrator)
- (optional) if you have various SIF versions on your machine, you will probably have to run 2.1.0 version of SIF by executing Import-Module SitecoreInstallFramework -Force -RequiredVersion 2.1.0

- change directory to D:\sc920_install
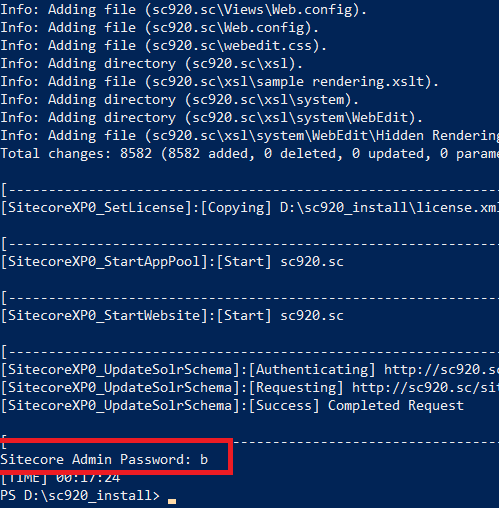
- execute .\sc920_install
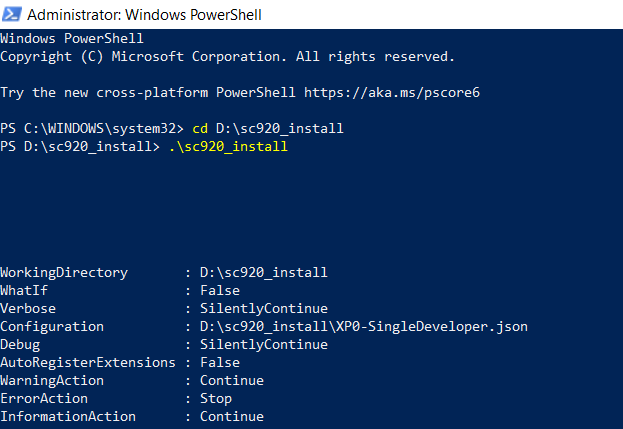
- hopefully there is nothing can stop the installation process and then note Sitecore Admin Password
- open a browser:
- navigate to http://sc920.local/ to see the Sitecore default page
- navigate to http://sc920.local/sitecore and then be redirected to https://sc920.identityserver.local/ (log into it by using account admin / Sitecore Admin Password)
How to uninstall it?
- open D:\sc920_install\sc920_install.ps1 and uncomment the line 79 + comment out the line 76 then save it

- open Windows PowerShell (run as administrator)
- change directory to D:\sc920_install
- execute .\sc920_install
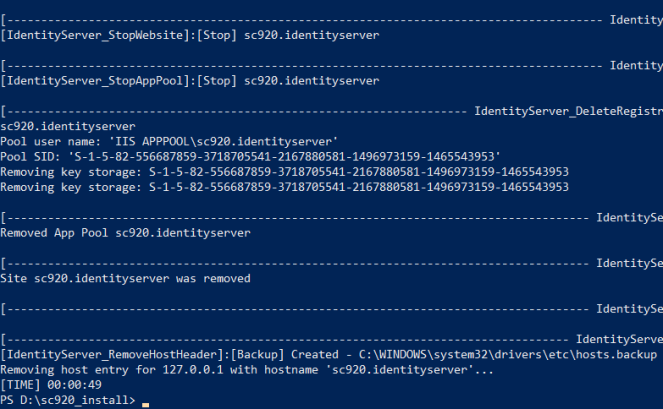
- hopefully, it runs well and cleans everything up
Got issues?
Please send your issues (with screenshots if possible) to viet.hoang.sitecore@gmail.com so that I have a chance to understand your problem and be able to suggest the solution.
Happy Sitecore 9.2.0 Installation!

Thanks, worked like a charm as always 🙂
LikeLiked by 1 person
Wow! Thanks for your quick check 😁
LikeLike
Thanks, nice post, it helped,
I got one issue when I was using SQL Server 2017
Unable to connect to master or target server ‘xp0_Processing.Pools’. You must have a user with the same password in master or target server ‘xp0_Processing.Pools’.
Later i tried SQL Server 2016 SP1 and it worked.
LikeLike
I meant SQL Server 2016 SP2
LikeLike
You may want to have a look at https://www.sitecorespark.com/blog/2017/11/sitecore-installation-framework-error-processing-pools
LikeLike