
Sitecore Experience Platform 9.0 Update 2 (aka Sitecore XP 9.0.2) has just been out. It’s a good chance for me to have another blog post by playing with the installation.
Note: personally, I want to use my own install directory rather than the default one.
- open A step by step guide for Sitecore 9 installation on your machine
- follow Step 1 to Step 4
- from Step 5 to Step 7: play with SOLR 6.6.2 instead of
SOLR 6.6.1 - follow Step 8 and Step 9
- bypass
Step 10, do this step instead: download and unzip Package for XP Single (Note: must log into https://dev.sitecore.net/ before downloading)- copy / paste Sitecore 9.0.2 rev. 180604 (OnPrem)_single.scwdp.zip to D:\sc9_install
- copy / paste Sitecore 9.0.2 rev. 180604 (OnPrem)_xp0xconnect.scwdp.zip to D:\sc9_install
- unzip XP0 Configuration files 9.0.2 rev. 180604.zip and copy / paste all files to D:\sc9_install
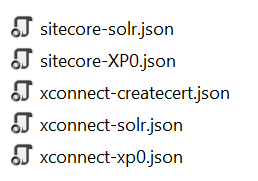
- open raw and then copy / paste sitecore-XP0.json into D:\sc9_install\sitecore-XP0.json
- open raw and then copy / paste xconnect-xp0.json into D:\sc9_install\xconnect-xp0.json

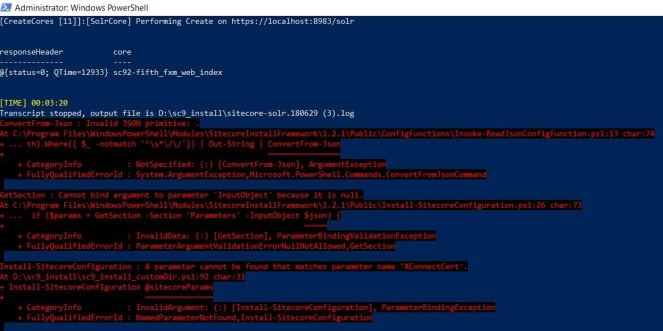
- Note: you will normally see the error “Invalid JSON primitive” if you do Copy source to clipboard due to an unrecognized escape sequence. The operation keeps going on, however there will be no xConnect site created later
- follow Step 11
- bypass
Step 12, do this step instead: download sc9_install_customDir.ps1 and then copy / paste it to D:\sc9_install, after that open it to correct 05 parameters below:- $prefix
- $InstallDirectory (Note: this one is to specify your own install directory)
- $SqlServer
- $SqlAdminUser
- $SqlAdminPassword
- follow Step 13
- bypass
Step 14, do this step instead:- DO NOT forget to perform Post-Installation Steps
- follow Chapter 6 Sitecore XP Post-Installation Steps (Page 39 – 51) in Sitecore 9.0 Update 2 Installation Guide
- DO NOT forget to perform Post-Installation Steps
How to uninstall it?
- download sc9_uninstall.ps1 and put it into D:\sc9_install then open it to correct 07 parameters below:
- $Prefix
- $InstallDirectory
- $SolrService
- $PathToSolr
- $SqlServer
- $SqlAccount
- $SqlPassword
- open Windows PowerShell (run as administrator)
- change directory to D:\sc9_install
- execute .\sc9_install

- hopefully, it runs well and cleans everything up
Got issues?
Please send your issues (with screenshots if possible) to viet.hoang.sitecore@gmail.com so that I have a chance to understand your problem and be able to suggest the solution.
Happy Sitecore 9 Playing!

Whats different in the installation of 9.0.2 ? comparing to 9.0.1?
LikeLike
As far as I know, the Post-Installation steps are different between 9.0.1 and 9.0.2 😀
LikeLike
Solr 6.6.2 – why not 6.6.4?
LikeLike
Because Sitecore says that (in the Installation Guide) 😀
IMO, Solr 6.6.4 should be OK as well
LikeLike
I am getting the below error when I followed the steps. Please help.
Failed to construct a huffman tree using the length array. The stream might be corrupted.
Learn more at: http://go.microsoft.com/fwlink/?LinkId=221672#ERROR_EXECUTING_METHOD.
Install-SitecoreConfiguration : Command C:\Program Files\iis\Microsoft Web Deploy V3\msdeploy.exe returned a non-zero
exit code – (-1)
At E:\sc9_install\sc9_install.ps1:92 char:1
+ Install-SitecoreConfiguration @sitecoreParams
+ ~~~~~~~~~~~~~~~~~~~~~~~~~~~~~~~~~~~~~~~~~~~~~
+ CategoryInfo : NotSpecified: (:) [Write-Error], WriteErrorException
+ FullyQualifiedErrorId : Microsoft.PowerShell.Commands.WriteErrorException,Install-SitecoreConfiguration
LikeLike
Hi, you should ensure that you already installed URL Rewrite 2.1 on the machine
LikeLike
Yes i has installed it already. I had fixed this issue by setting up path to the Data-Tier application framework in Windows Registry based on https://kb.sitecore.net/articles/019579.
LikeLiked by 1 person
Thanks for keeping me updated 🙂
LikeLike
Hi, What is this tool you are using to Open raw (JSON)?
LikeLike
Never mind. Just figured i had to click on your link. Thanks.
LikeLike
Hi Viet,
I am facing an issue while installing the Sitecore 9.0.2 by following this blog. The query is available here https://sitecore.stackexchange.com/questions/29111/a-parameter-cannot-be-found-that-matches-parameter-name-certificatename
LikeLike
Hi Prashant,
My suggestion:
1) open a NEW Windows PowerShell (run as administrator)
2) execute Import-Module SitecoreInstallFramework -Force -RequiredVersion 1.2.1
3) execute 9.0.2 install script
LikeLike